Publishing your file with Test Movie Cmd + Return(Mac), Ctrl+Enter (PC)
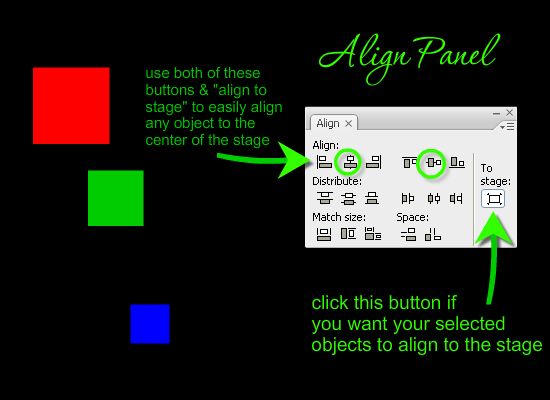
ALIGN PANEL
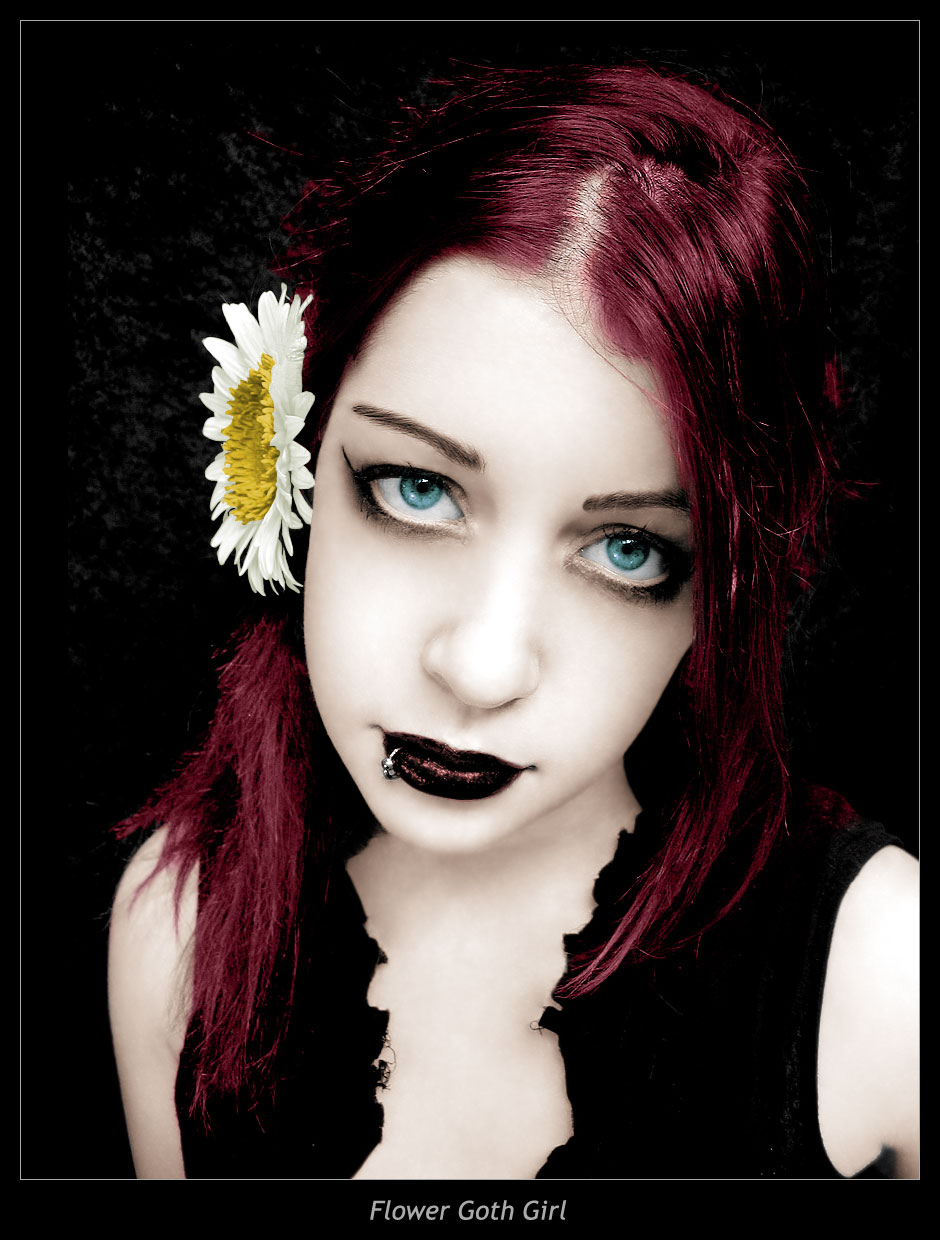
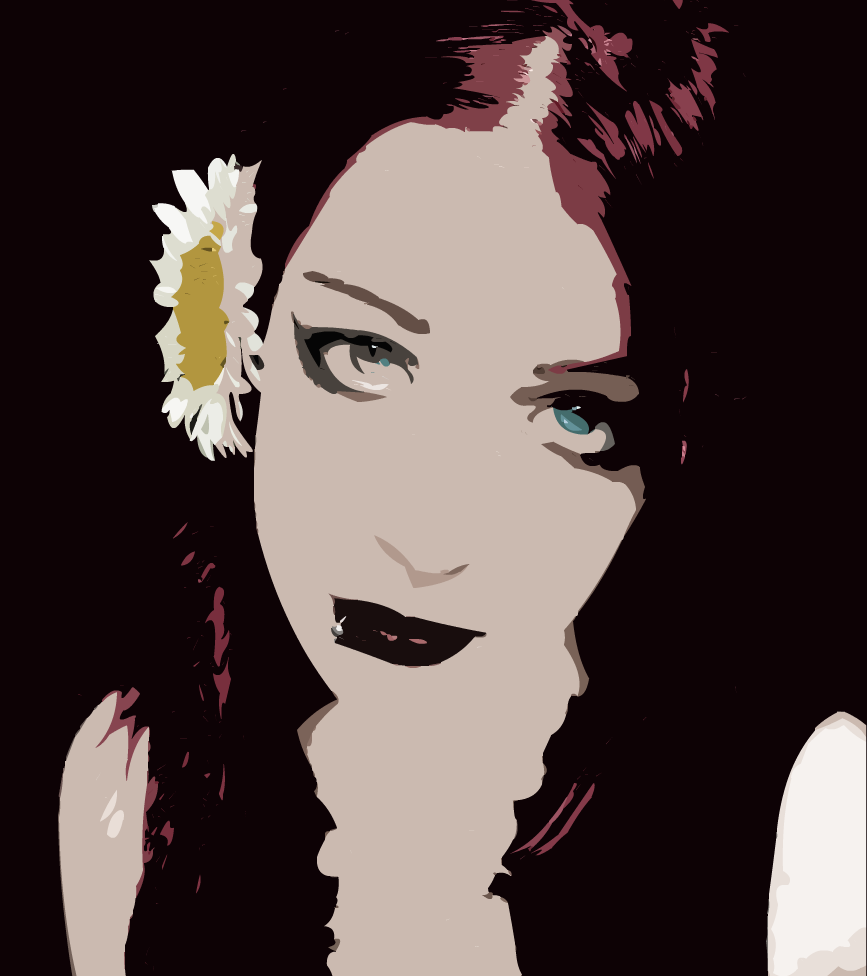
TRACE BITMAP: example and instructions
The Trace
Bitmap command converts a bitmap into a vector graphic with editable, discrete areas of color. Use this command to manipulate the image as a vector graphic, or to reduce file size.If you convert a bitmap to a vector graphic, the vector graphic is no longer linked to the bitmap symbol in the Library window.
*Note: If the imported bitmap contains complex shapes and many colors, the converted vector graphic may end up being a larger file size than the original bitmap.
Try a variety of settings in the Trace Bitmap dialog box to find a balance between file size and image quality.
You can also break apart a bitmap to modify the image using Flash drawing and painting tools or to paint with the bitmap as a fill.
To convert a bitmap to a vector graphic:
Select a bitmap in the current scene with the selection tool(v).
Choose Modify > Bitmap > Trace Bitmap.
1. Enter a Color Threshold value between 1 and 500.
When two pixels are compared, if the difference in the RGB color values is less than the color threshold, the two pixels are considered the same color. As you increase the threshold value, you decrease the number of colors/vector shapes. The more detailed you want your final image to be, the smaller you should make this number, but remember that more shapes mean bigger file size.
2. For Minimum Area, enter a value between 1 and 1000 to set the number of surrounding pixels to consider when assigning a color to a pixel.
3. For Curve Fit, select an option from the pop-up menu to determine how smoothly outlines are drawn.
The smoother the line is, the fewer vectors Flash needs to define it, and so the smaller the file size.
4. For Corner Threshold, select an option from the pop-up menu to determine whether sharp edges are retained or smoothed out.
The fewer the corners in the image, the smaller the file size.
5. To crash your computer & create a vector graphic that looks most like the original bitmap, enter the following values:
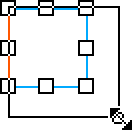
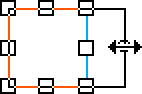
Scaling an object enlarges or reduces the object horizontally, vertically, or both.
Select a graphic object or objects on the Stage.
Select Modify > Transform > Scale.
Do one of the following:
To scale the object both horizontally and vertically, drag one of the corner handles. Proportions are maintained as you scale. Shift-drag to scale nonuniformly.
To scale the object either horizontally or vertically, drag a center handle.
To end the transformation, click outside the selected object or objects.
Note: When you increase the size of a number of items, items near the edges of the bounding box might be moved off the Stage. If this occurs, select View > Pasteboard to see the elements that are beyond the edges of the Stage.
The Envelope modifier lets you warp and distort objects. An envelope is a bounding box that contains one or more objects. Changes made to an envelope’s shape affect the shape of the objects in the envelope. You edit the shape of an envelope by adjusting its points and tangent handles.
Note: The Envelope modifier cannot modify symbols, bitmaps, video objects, sounds, gradients, object groups, or text. If a multiple selection contains any of these items, only the shape objects are distorted. To modify text, first convert the characters to shape objects.
Select a shape on the Stage.
Select Modify > Transform > Envelope.
Drag the points and tangent handles to modify the envelope.