 HOW TO FTP your files up to the Internet / aka "Defining a site" in Dreamweaver HOW TO FTP your files up to the Internet / aka "Defining a site" in Dreamweaver
When you want to upload a website to the web you first need to define a site in Dreamweaver. Once you do this you can successfully upload your website via FTP(File Transfer Protocol) to the web. Instructions are below.
 Defining a Site in Dreamweaver Defining a Site in Dreamweaver
 Instructions for Setting up your CI site Instructions for Setting up your CI site

DIRECTIONS FOR "DEFINING A SITE" IN DREAMWEAVER CS4
The first time you create a"site" in Dreamweaver you can create it one of two ways. The first is to go to the Site menu and choose New Site.
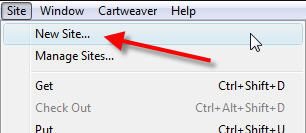
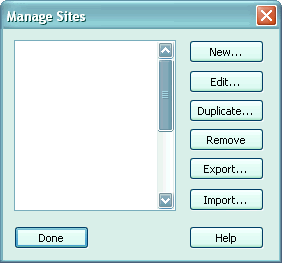
or you can go to the Site menu and choose Manage Sites which will aunch the Manage Sites dialog box(see image below). You'll then choose: New...
A popup will appear under the New button with two options.
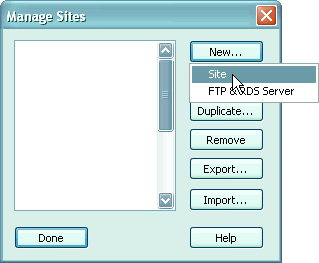
-Click the Site option.
The Site Definition wizard will open. To continue working in the wizard format, make sure the Basic tab is selected.
What would you like to name your site?
-Enter yourlastname_site (or a meaningful name of your choice) in the answer box.
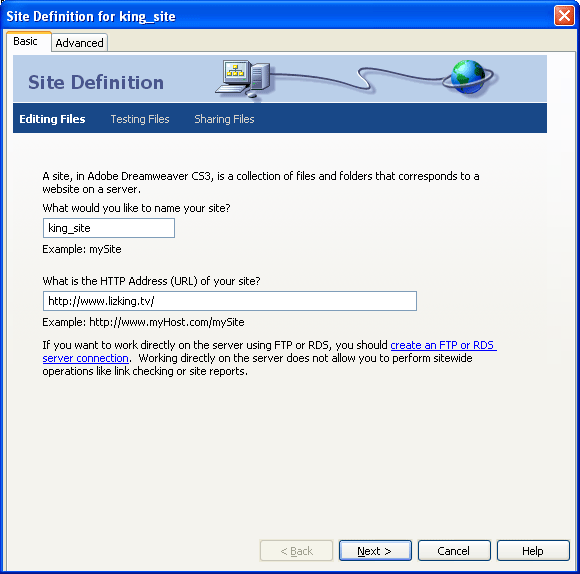
-Click Next>
Note: Dreamweaver will create your new site folder for you. Simply enter the name.
Do you want to work with a server technology such as ColdFusion, ASP.NET, ASP, JSP, or PHP?
-For this course we won't be using these so select the No radio button.
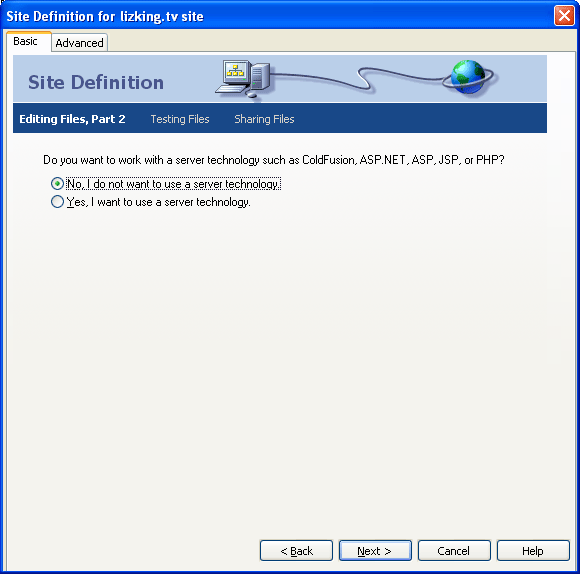
-Click Next>
How do you want to work with your files during development?
-Select the Edit local copies on my machine... radio button.
Where on your computer do you want to store your files?
-You can enter a path and folder name manually or use the browse button to select an existing folder or to create a new one on any of your drives.
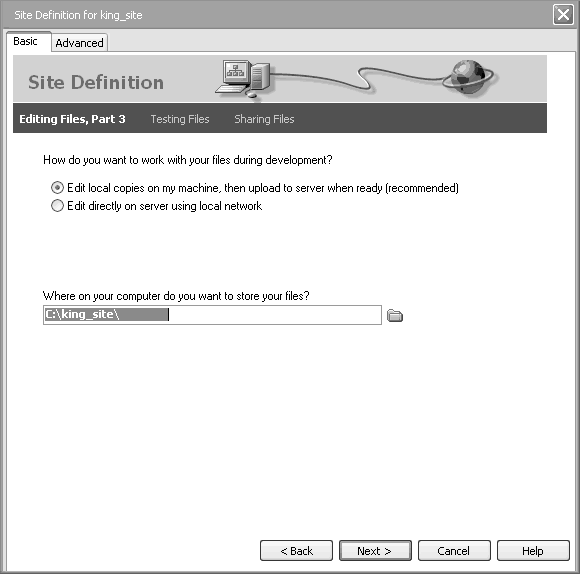
-Click Next>
How do you connect to your remote server?
-For now, choose None.

-Click Next>
Note: When you are ready to publish your site, get the connection information from your hosting company. Edit the site by opening the Manage Site dialog, select this site, then click the Edit button. Change the setting in this screen from None to FTP and you will be able to enter the server address, login, and password to connect to your remote server.
This screen summarizes your site definition parameters.
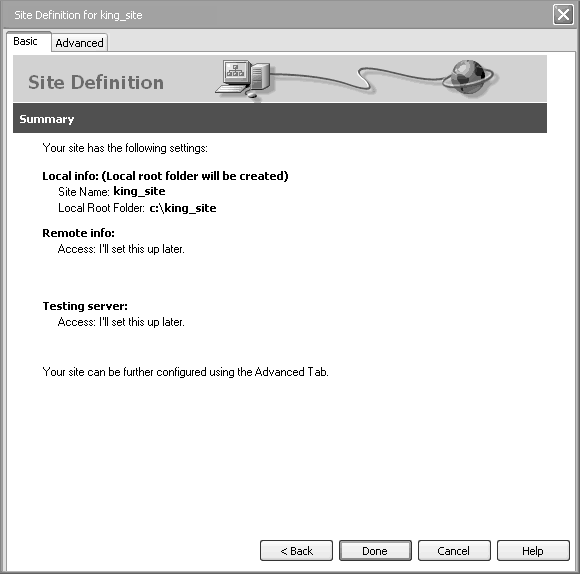
-Click Done
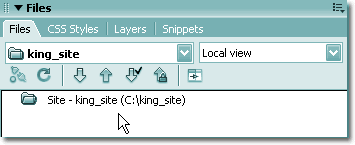
The Wizard closes and your new site appears in the Manage Sites window.

-Click Done
Your new site appears in your Files panel and is your currently selected Dreamweaver site.
Create a new document and save it in your new site
-Choose File > New
The New Document window will open.
-Select Basic page from the Category list.
-Select HTML from the Basic page list.
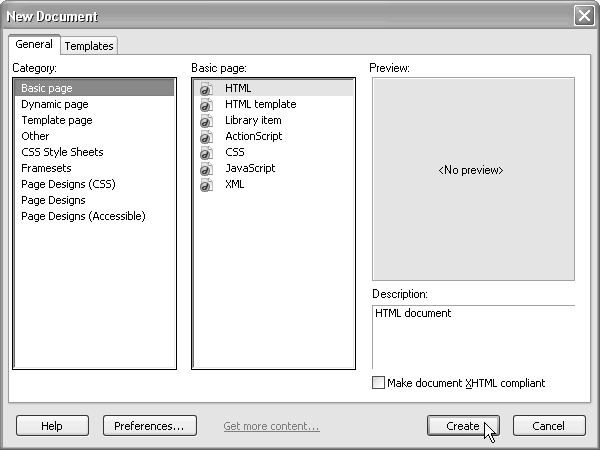
-Click Create
A new document will open, but it is not yet saved. For Dreamweaver to manage your files and assets, the file must be saved in the site.
-Choose File > Save As
The Save As window will open.
The Save in box should be set to yourlastname_site. If it's not, browse to your new site folder and select it.
-Enter index in the File name box.
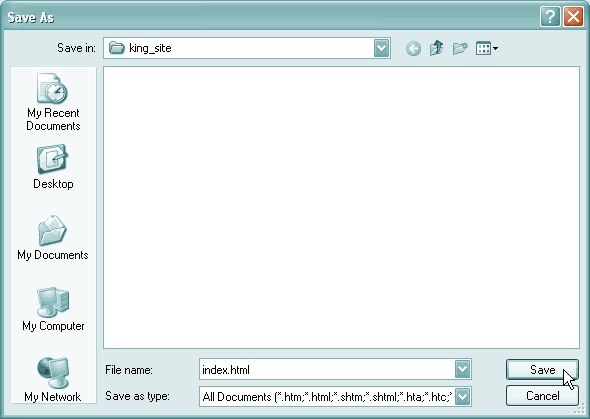
-Click Save
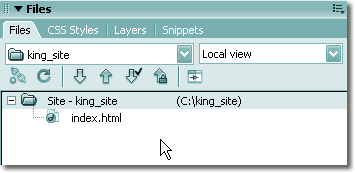
Your new file appears in the Files panel.
Instructions for Setting up your CI website
FTP and Web Server specs:
Browsing your personal site (this is your personal URL):
http://student.csuci.edu/~johndoe810
*Note: there is no period between your first and last name
------------------------------------------------------------
Defining a site in Dreamweaver to connect to the CSUCI server via FTP:
In Dreamweaver:
- Go to the menu: Site>Manage Sites
- Select New…
- then choose Site
- Go to the Advanced tab
- With LOCAL INFO selected
- Set SITE NAME to "yourlastname_site" (or whatever you want)
- Set LOCAL ROOT FOLDER to your local where your web files will be stored (this will be the folder you named called: yourlastname_site
- With REMOTE INFO selected
- Set SERVER ACCESS to FTP
- Set FTP HOST to student.csuci.edu
- Set HOST DIRECTORY to: public_html
- Set LOGIN to your Dolphin User Name(john.doe810)
- Set PASSWORD to your Dolphin Password
- check the box that says Secure FTP
If you are using your own computer, set the PASSWORD, otherwise, leave PASSWORD blank so it is not saved on a publicly accessible computer.
Select OK to complete the creation of a new site
Select DONE to finish working with site definition
select the CONNECT button (at the top-left of the site window, just to the right of the site name) to access your FTP account
You will be asked for your password, and then you'll be connected to the server
The left side of the SITE window will show all files currently on the server in your directory
The right side of the SITE window will show all the files on your local drive
Uploading files:
Once you've connected to the server, you can upload your site files (or download files from the server to your local computer).
---------------------------------------------------------------------------------------
Adding a favicon to your site:
FAVICONS 
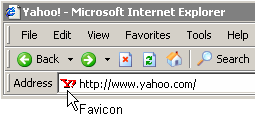
Notice the red “Y!” symbol that appears in the left-most area of the address bar in Internet Explorer screenshot below. This is Yahoo’s favicon. These favicons (favorites icons), sometimes called “bookmark icons,” appear after adding a website with a favicon to the favorites menu in Internet Explorer and certain other browsers.
plugins to create favicons: http://www.telegraphics.com.au/sw/
ico generators: http://www.chami.com/html-kit/services/favicon/
Directions:
- Create your graphic in Photoshop or Illustrator
- When you are done designing, crop to 32x32 or 16x16 pixels
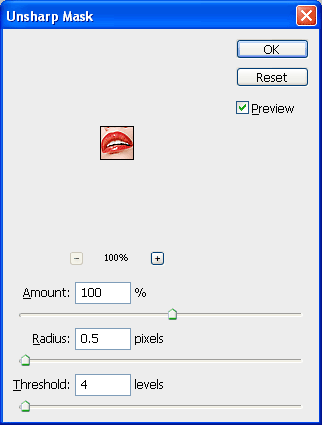
- use unsharp mask to sharpen the image up (optional)
- Using the ico plug-in listed above to save it for the web or save as a .png file (upload it to the server)
- Add the following code to the head tag on your index.html page of your site:
Below are 2 ways to add a favicon to your site. One using a .png file the other is using a .ico file. For a .ico file you need to download the plugin from: http://www.telegraphics.com.au/sw/
To install on Windows:
- Move the plugin into the "File Formats" folder
inside your Photoshop Plugins folder:
- On Windows, ICOFormat.8bi
- On OS X/Classic, icoformat (CS2/Mac version is ICOFormat_cs2.plugin)
- On 68K MacOS, icoformat(68K)
- Quit and relaunch Photoshop, if it's already running.
To use the plugin
- Use Photoshop's Open command (File menu) to open .ICO files (which will now appear
in the file browser)
- Use Photoshop's Save command to create .ICO files
-------------------------------------------------------------------------------------------------
Then follow these instructions:
1. http://www.w3.org/2005/10/howto-favicon
Add this to the head tag of your html page:
<link rel="icon" type="image/png" href="favicon.png" />
or...
2. Add this to the head tag of your html page:
<link rel="shortcut icon" href="favicon.ico" type="image/x-icon" />
----------------------------------------------
Some examples of current favicons on the web:

More articles on creating favicons:
http://www.photoshopsupport.com/tutorials/jennifer/favicon.html
----------------------------------------------------------------------------------------------------
Some favicons I made, started out like this:


Then resized to 32x32px:
  
See a favicon finished html pages:
- using an .ico file for the favicon: click here
- using an .png file for the favicon: click here
|


